
käty
olup


Quake is a first-person shooter from 1996 and, thanks to Trenchbroom, allows the creation of custom maps. Because of that, it's been part of the level design specialization journey at BUas for a few years. While I had previous experience with the development pipeline of a Quake map, I wanted to remind myself of the ways that the tools work, so I could assist year 2 students more efficiently as a teaching assistant by creating a Quake map as a self-study project.
individual
Level design
trench-broom
6 weeks
self-study
overview
my responsibilities
level design
-
Created the design and white-box block-out for the whole level
-
Created modular kit block-out for MVP area
-
Helped to set-dress the MVP area
-
Added mission flow into the level using the tool provided by programmers
-
Worked with systems and narrative designers to achieve the intended gameplay experience
-
In collaboration with a programmer created level events such as breaking and flickering lights
lighting design
-
Gathered the audio effects that were required for the game
-
Implemented the ambient sound for the level
-
Created sound effect level events to support the spooky mood of the game
project showcase


project timeline
concepting
level proposal
pre-production
production
release
Playing reference games
Researching the chosen location
Gameplay ideation sketches
Gameplay dynamics investigation
Level layout sketches
Level pillars and one-liners
Player experience
Amosphere and location
General level flow, key locations and events
Level sketches
Gameplay sketches
Prototype block-out
Level one-pager and documentation
QA, playtesting and iterations
Iterated white-box block-out
Gameplay implementation
Narrative implementation
Modular kit block-out
Sound and light events implementation
Bug fixing
Set-dressing
Marketing
QA and playtesting
Minor iterations


level design
Hell Gate is quite experimental Quake map with a focus on lighting and texturing. The main premise of the level was to learn and practice lighting and texturing for Quake to teach others. While working on the project on the side, my main responsibility was guiding and mentoring second-year students on their Quake maps. Therefore, the goal for the project was to remind myself how to work with Trenchbroom as well as learn the most efficient way of approaching lighting, which I could then reference while teaching other students.
Level one-pager

Level vision
From the hot depths of hell to the mysterious gate in an earthly, evil-infested temple, the Hell Gate will take the player through different dimensions to slay the evil and purify the temple. Using the portal to hell realm, the player must clear out the rooms and eliminate the evil to restore the temple to its previous glory.
The heavily Call of Duty: Black Ops zombies gamemode inspired map twists and bends the flow of the map, challenging the player to utilize the hell gate and travel between realms to complete the level.
Level pillars
One map, two realms
The map exists in two realms, which the player travels between to complete the objectives.
Two lighting and texturing scenarios
The level features two realms, which both feature a distinct visual style, utilizing geometry, architecture, lighting, and texturing to change the theme and mood.
Level play-through
Level LIGHTING
As a teaching assistant, my responsibilities included creating a presentation on lighting and texturing for the level design students, which later turned into a visual communication lecture. To prepare for the lecture as well as gain extra experience in the subject, a heavy focus was placed during the Quake map development on lighting.
When lighting the Quake map, a few design and environment art fundamentals were applied to achieve the intended mood in the level.
Examples of principles used during the lighting process:
1. Points of interest should have the brightest light value.
2. The player should be able to navigate any part of the level without having issues with not seeing due to too low lighting.
3. Lighting should consist of primary and secondary lights, the first being the brightest lights, and depending on the lighting scenario, different colour from the secondary lights, whereas the secondary lights' main purpose is to color the shadows and/or fill in the dark areas.
4. For more dynamic lighting, it's good to use a cooler light colour for the fill lights since it increases the contrast between the main areas of interest and the rest of the space.
5. Usage of different lighting concepts, such as backlighting, bounce light, soft light, hard light, etc., can greatly improve the readability or impact of a location or a setup.
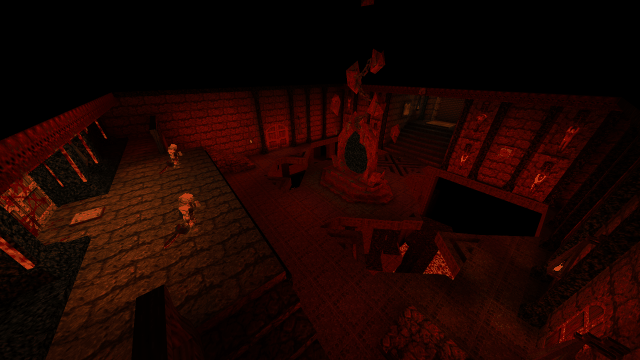
hell realm

Relic room
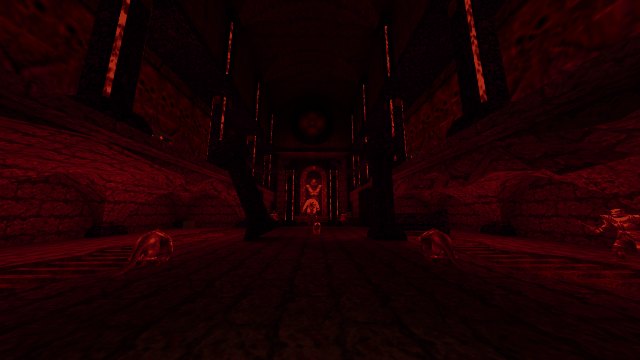
Altar room
earth realm
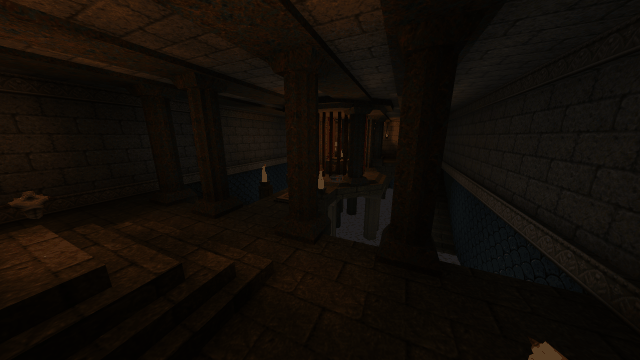
Relic room
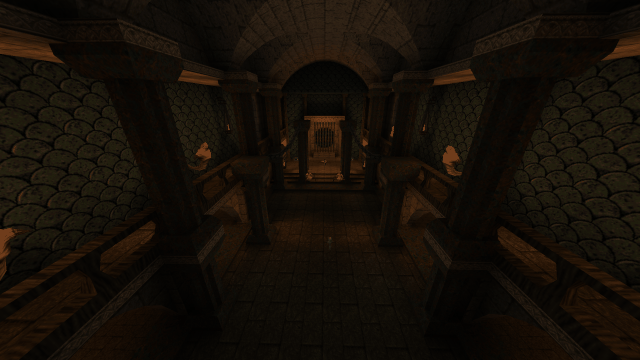
Altar room
Portal room
Exmaples of the locations in the earth vs hell realm

Portal room
Portal room
Small corridor room
Altar room

Big corridors
Small corridors
Relic room
Relic room

workflow breakdown
sketching


When sketching, the main goal was to explore different combinations of architecture to figure out what would be interesting for the player to explore. I took inspiration from architecture in Japan as well as from games that had interesting layouts in their levels.
blockouts


I treated blocking out the map as sketching in 3D. The map went through rapid iterations in this phase and it allowed me to create a decent base to build modular kit blockout on top of.
iterations


In order to save time, the modular kit blockout was done using environment artist's modular kit which came with some complications since it had a lot more detail to it than a level design modular kit, however, I made it work by following the environment artist's instructions and feedback.
art pass


The final set-dressing was done mainly by artists, however, since they were had their hands full, I helped to set-dress small parts of the level and gave them feedback based on playtest data I gathered when testing the level with players.
working with references


iterations


Conclusion
Positive take-aways
-
This project
Improvement points
-
During the development
